Here’s my top three:
Most of us will consider cost, user reviews and the position of the app in the app store as to whether it’s worthwhile downloading - and rightly so. There are thousands of apps in the store, so be picky!
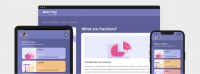
1. ScreenChomp
ScreenChomp has received some great user reviews, and while free apps generally score higher than paid-for ones, Screen Chomp has achieved an impressive four-star rating.
The free app uses the strapline: Record it. Sketch it. Share it.
This allows users to touch record and capture the onscreen and audio instructions onto a plain or image-filled background. Sketch refers to the presenter’s ability to draw images on the iPad and talk students through the content. Then once you’ve finished your whiteboard session you can stop record and save the session to screencomp.com and generate a simple, shareable web link.
ScreenChomp is by no means a complex app, but the way in which it combines a few simple features makes it a useful and reliable free app to add to your digital teaching toolkit.
2. ZigZag Board
While there are apps available to draw images, Zigzag has come highly recommended. Based on an extensive number of positive reviews ZigZag Board offers some unique features compared to other free apps.
Like many of the free whiteboard apps we tested, it includes a small range of pen colours as well as an adjustable pen thickness feature. However, it also allows users to set up virtual lessons or walkthroughs. The easy-to-use collaborating tool lets students join and view a presentation live on their iPad or laptop so they can join in wherever they are. The only downside to this is that the free app only offers passive participation, so while students can view the full length of the whiteboard session, they are not able to respond or actively interact with the presenter.
3. SyncSpace
After installing SyncSpace I was surprised and slightly disappointed to find that it didn’t work when the iPad was horizontal and in landscape mode. Nevertheless, the reviews were overwhelming (4.5 star rating), so I wanted to give it the benefit of the doubt.
SyncSpace lets people express and explore visual ideas together, with an almost unlimited drawing space that’s controlled by a zoom function allowing you to focus in on details or zoom out to add context to a drawing.
The collaborative app allows any invited SyncSpace members to add and update drawings in real-time.
As with most apps, SyncSpace promotes social sharing via Twitter and Facebook, but also enables users to share pdf files through online tools such as Dropbox, Evernote and iBooks.
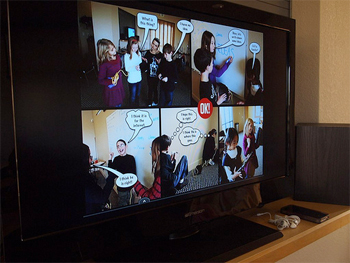
How to connect your iPad to a projector or HD TV
Checklist:
- Apple digital AV adapter
- HDMI cable
- Projector or HD-ready TV (with HDMI port)
Instructions:
- Connect your Apple AV adapter to your iPad
- Insert the HDMI cable into the port on the Apple adapter
- Insert the other end of the HDMI cable into the recognised HDMI port on your projector or TV
- Switch on both devices and select ‘source search’ until your iPad’s home screen appears on your projector or TV screen
Photo credit: flickingerbrad