Looking back on our first year with the space, I’m proud of what we have accomplished and I am also aware of how much we have learned. Over the years, my role has shifted from coordinator to coach, and now I see it as part gardener as well. I think gardens are a great metaphor for maker/innovation spaces because they offer fertile grounds where new ideas and opportunities can flourish, with the right support and nourishment. As the gardener, it is our job to invite visitors into the space and make sure all of the right ingredients are present to help seeds (ideas and projects) grow. We are there to help students and teachers discover how much water or fertilizer (tools and materials) certain seeds might need and which ones require sun while others require shade (high and low-tech support).
I see the role of the gardener as holding the responsibility to maintain the plot and provide the most fertile soil possible (providing a flexible, responsive space) but not to control everything in the garden or make all of the decisions about what seeds can be planted. Instead, the goal is simply to support and nurture and provide the scaffolding for new gardeners to be created, so that students and teachers feel welcome in the space and a sense of true ownership of their plots of seeds! As they discover which seeds take more time to grow and which ones will become flowers or produce fruits and vegetables, they come to develop skills in problem solving, resilience, patience, empathy, and the need to learn from failure when a plant (project) fails.
Here are a few of my key takeaways after spending the year nurturing our new space:
- Stay open
- Even if you have a clear, amazing vision for how you think your space should be used and what will happen there, work hard to stay open and continue to let students and teachers shape the space itself and how it’s used.
- Example: I started the year thinking parts of our pegboard could be a space for building marble runs, but the students preferred to make them on the magnetic wall instead.
- Change it!
- In addition to staying open to new ideas and configurations, I have discovered that it is valuable to simply change how the room is arranged or the ways certain materials are used. This can help students and teachers establish the norm that the space is a place of growth and development, and change is not only accepted, but invited.
- Example: Early in the year I decided to flip all of the tables for a day and use them as walls to create mini-spaces within the room, where students could engage in activities like robotics, green screen recording, and crafting. When students walked in there were many exclamations of surprise that we were not using the tables in a traditional way. Later in the year, students were able to ask if we could rearrange or flip the tables because they knew the space could change anytime.
- Avoid constraints
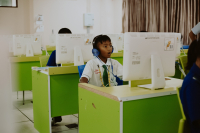
- Flexibility is critical in our IDEA Studio. All of the furniture in the room is on wheels or tennis balls so it can be easily moved. The setup is constantly changing and so is how we’re using various wall spaces and storage. If possible, avoid constraining a space to only one kind of arrangement, one kind of lighting, or one use for a wall or storage area. Likewise, consider access to power and water, because without them the work your students do might be constrained to only one area or clean work instead of messy (we discovered that not having access to water is a big challenge!)
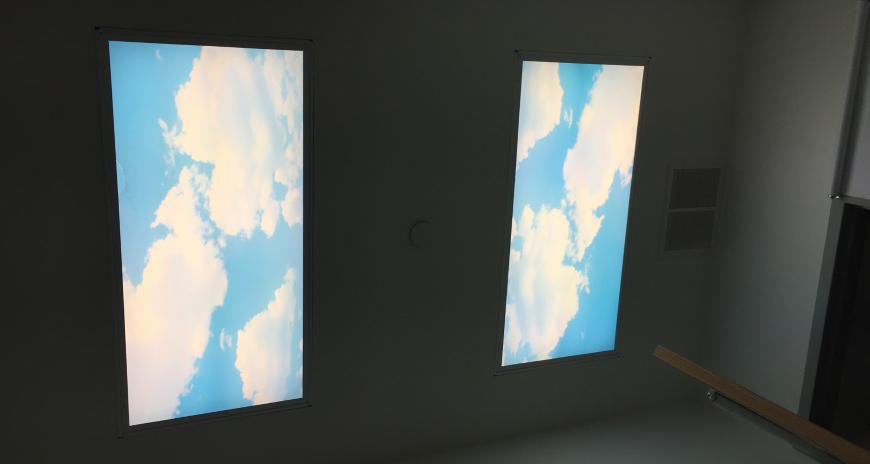
- Example: We built a lot of flexibility into the lighting so the room could be lit with various kinds and levels of brightness, ranging from cloud shaped lights to blue sky lights, to running lights to bright, hanging lights! This allows us to dim the room, darken just a few sections, or make it really bright (in a windowless room!).
- Think about noise
- With various tools and machines working around the clock in a makerspace, it can get quite noisy! If possible, find ways to cordon off the sound and also make sure to consider additional noise from the ventilation system.
- Example: Our IDEA Studio has exposed pipes and a high ceiling in the middle of the room as well as a large HVAC system that creates a constant hum of white noise and when that is added to the sound of the 3D printer running, it can be a challenge to hear students. We’re exploring ways to deal with this constraint next year.
- Create systems and tools
- After launching a new space you might discover that you need some new systems to make the most effective use of the space and students’ time. To manage noise, help students learn to safely handle tools, give you notifications about how their work is going, or know which materials they can take or must return, you might need to develop tools or systems unique to your space. If you encounter a problem in how your space is functioning, see if a simple, homemade system can help, and check Twitter and Pinterest for ideas!
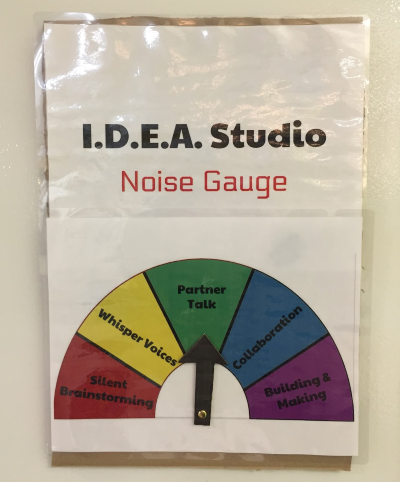
- Example: One challenge in our space is the amount of noise and when the room is full of students working, the sound levels can make it difficult to focus. After seeing a similar idea in another makerspace on Twitter, I created a ‘noise gauge’ to help students know what the expectation was for the level of their voices. I also use a system of cups and pom-poms to help students silently notify me if they are all set (green), need help (red), or are ready to move on (pom-pom on top).
- Access is important
- As a Reggio-inspired educator, I believe in giving students access to materials at their eye/hand level from a young age. Since our space is used by Pre-K to 5th grade students, this means keeping as many materials as possible low to the ground and exposed, in clear storage containers that students can dig into or easily open. Having materials in a variety of clear bins with labels also really helps with organization over time and helps to ensure that materials don’t go to waste because you forgot they were there (something we found when bins either were not clear or had lids)!
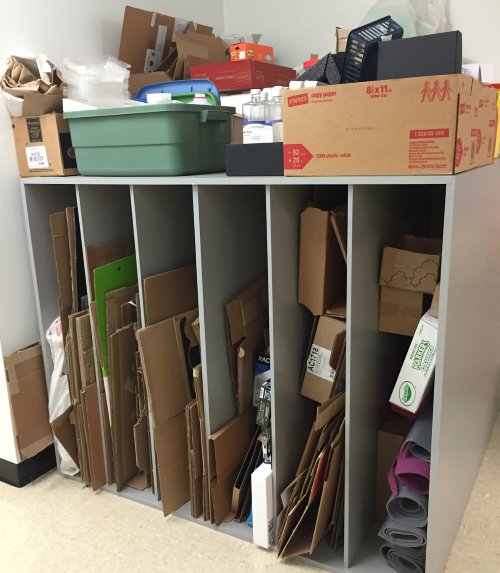
- Example: With the help of our facilities team, we built a very large, custom storage piece with open slots for students to easily grab cardboard.
- Design and decor matter
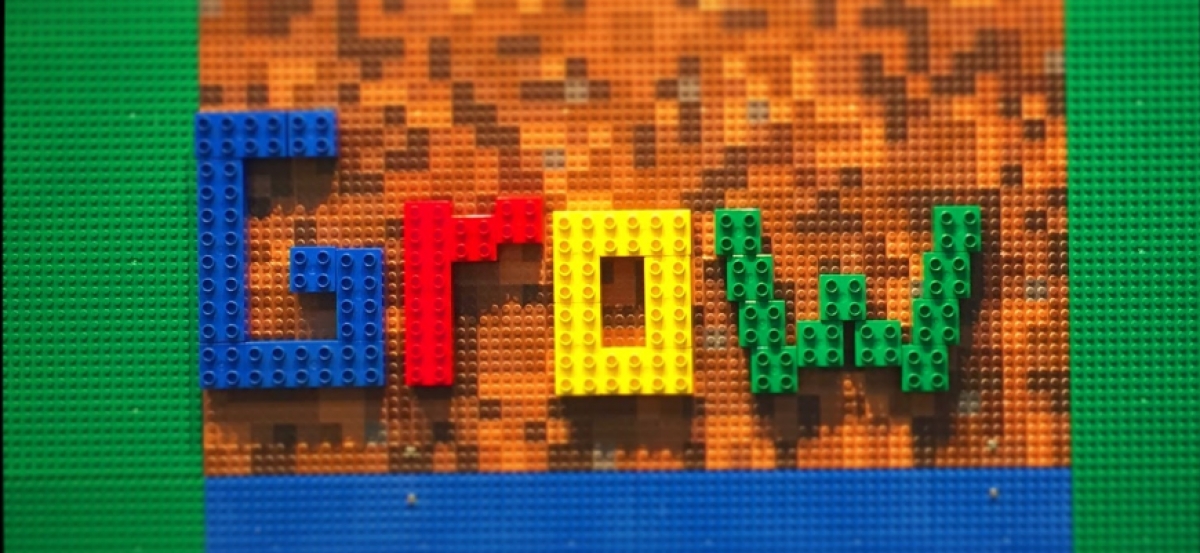
- As Lindsey Own wrote about so well in this post, the colour, design, and decor of a maker/innovation space is critical so that all students feel welcome and excited to visit and work there. When we were creating our I.D.E.A. Studio, we wanted the space to feel warm, welcoming, and energetic to all of our students and faculty. In addition to making most wall spaces interactive, inviting visitors to play, we added bright splashes of colour. Our pegboard is bright yellow, we have two bright green walls for green screen recording, some colourful floor mats to sit on, and a colourful world map on the wall for students to explore. The Lego wall has traditional greens and blues to serve as grass and water and we added one panel of Minecraft-esc dirt patterns, plus a silver magnetic wall. The rest of the walls are white, leaving a blank slate (which students can fill on the writable portion). There are no posters, no pink and purple, or black and dark colours. The ceiling is partially exposed and painted blue, like the sky and the ceiling panels (and lights) are shaped like clouds so the space feels more open and is something all students can relate to when they come in to work and explore. When you’re designing your space, think carefully about colours, decorations, signage, walls, flooring, and anything that draws students’ attention in the room. How will each of those affect the interest of all students’ to be in the space and feel welcome there?
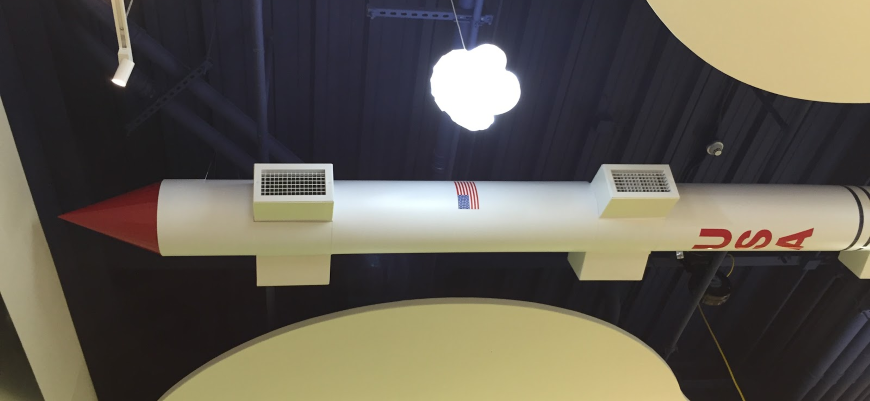
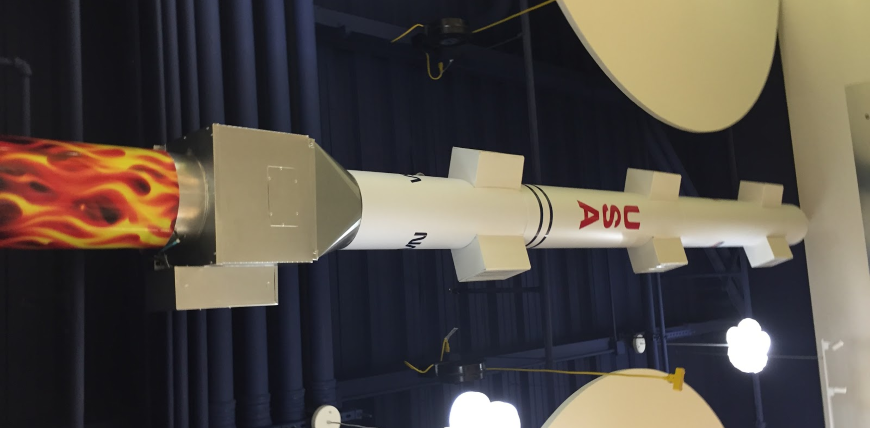
- Example: The HVAC unit that was installed in our space is quite large. Knowing that it would stick out prominently from the ceiling, we decided to get creative and cover it to look like a NASA rocket with the hope that it would encourage students to be creative, imaginative, and maybe even inspire them to consider space travel while explore STEAM projects in the space.
- Keep asking questions
- The final piece of advice I would offer to educators managing and nurturing these types of spaces is to keep asking questions. Try to meet regularly with teachers, students, and other community members to ask: What more can we do in the space? How is the space or specific tools/projects working for you? What could be better? What are other schools doing with these spaces? What has our best success been so far? Why did it work? How might we encourage more of that?
- The final piece of advice I would offer to educators managing and nurturing these types of spaces is to keep asking questions. Try to meet regularly with teachers, students, and other community members to ask: What more can we do in the space? How is the space or specific tools/projects working for you? What could be better? What are other schools doing with these spaces? What has our best success been so far? Why did it work? How might we encourage more of that?
Have you installed similar spaces in your school? Let us know below!